Showing posts with label Smooch Spritz. Show all posts

Wednesday, November 25, 2015

"Come Unto Me" Art Journal Page by Tracey Sabella

Hi everyone! It's Tracey here to share the latest addition to my Scripture art journal. 

Donna's fabulous products are so versatile. It's so easy to switch gears from the bold and colorful page I posted recently to this subtle and nearly monochromatic page full of rugged textures. The thick chipboard pages in Donna's Scrapbook Adhesives by 3L® are fabulous for mixed media. 

"Come Unto Me"

Tips and Techniques
Donna's Clearsnap Mix'd Media Inx are so fabulous to work with. Here I've stamped the sentiment on basic white cardstock with Stormy Mix'd Media Inx, then heat set with clear embossing powder. I like to stamp first then die cut so I can center the sentiment in the die before cutting. A piece of washi tape will keep it in place. Once cut, I used my Foam Blending Tool to rub more of the Stormy ink across the die cut.

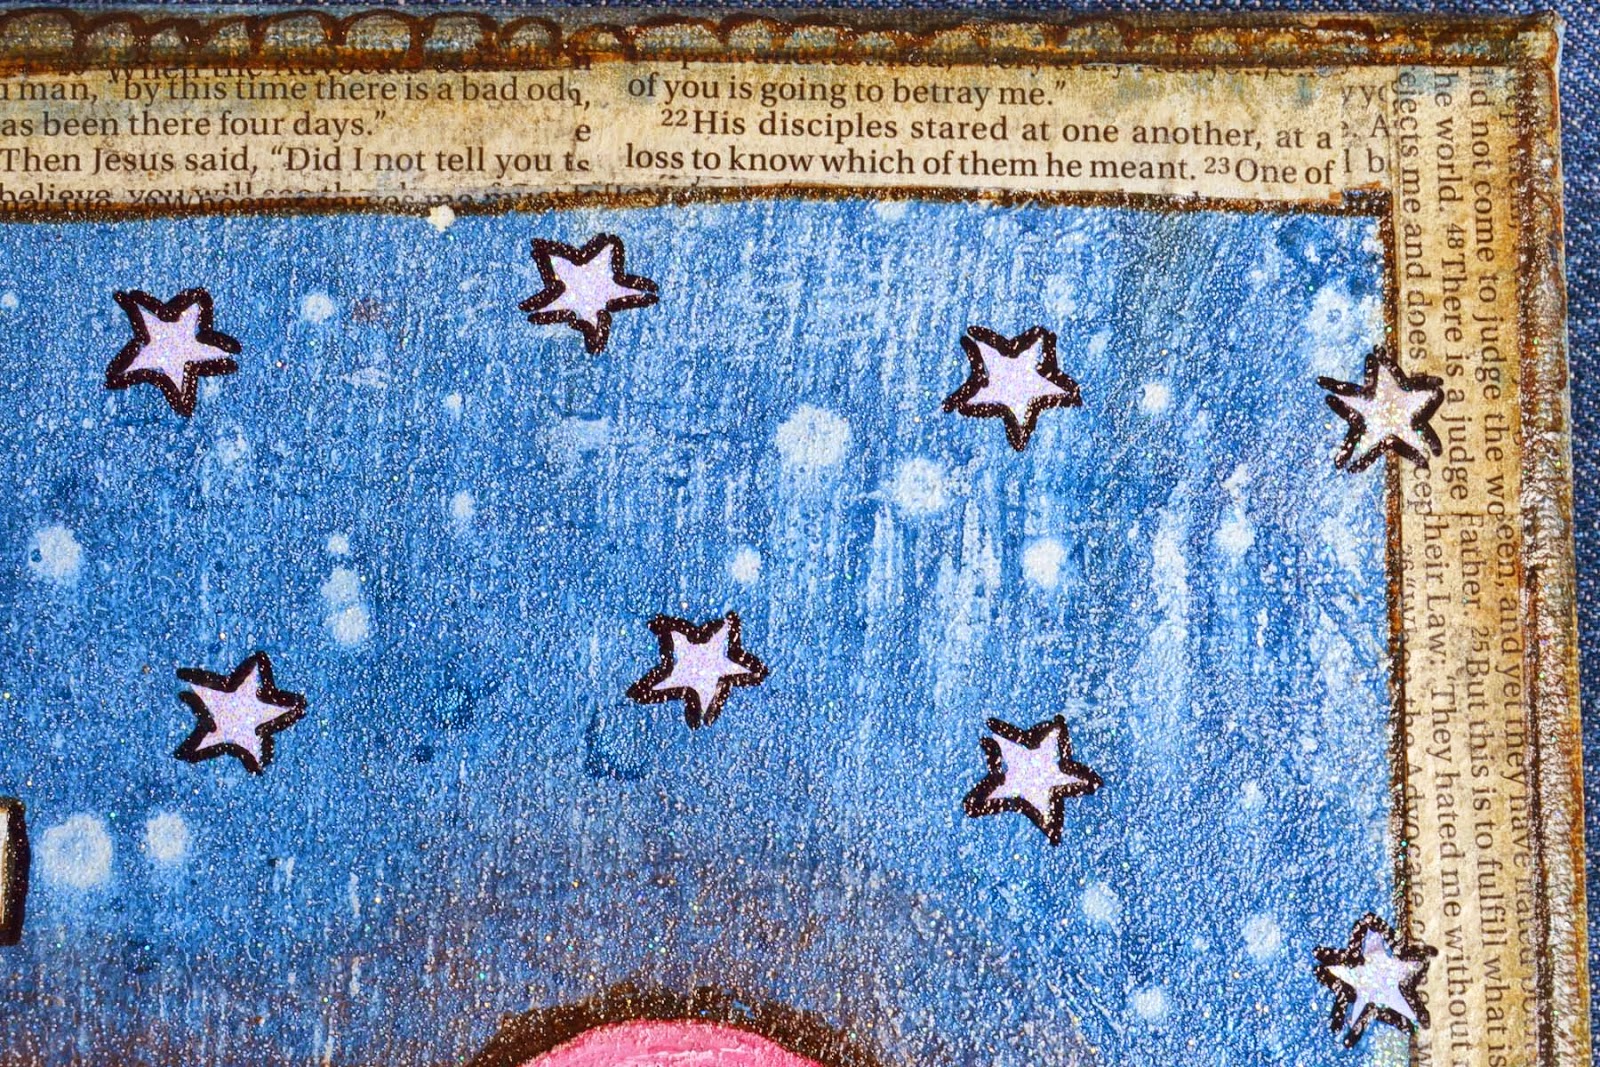
The background around the sentiment and the page edges are brushed with Donna's Clearsnap Woodstain Smooch Spritz, then spritzed with water to lighten and move the color.

I scored a vintage dictionary at our library book sale a couple months ago and used it to create one of Donna's Spellbinders Bitty Blossom flowers. It's rubbed lightly with Stormy Mix'd Media Inx to color. 

In keeping with the monochromatic look for my journal page, I very lightly sprinkled Donna's Black and Jasmine Mix'd Media Inx Embossing powder over her Scrapbook Adhesives by 3L® Foam Swirls and heat set. Because I used a light hand with the embossing powder, the swirls were still just a little tacky in places, so I sprinkled Donna's Clearsnap Sugar Shimmer Twinkle Dust Glitter to add a girly, sparkly touch. I also rubbed the edges lightly with Stormy Mix'd Media Inx. 

I distressed the lace after snipping off the lower edge and kept it the natural color.

I wanted a hint of textured color on my chipboard flower to draw my eye to the sentiment. I mixed Donna's Scrapbook Adhesives by 3L® Pigment powders into whipped spackle and dabbed it onto the chipboard with a brush to create this lovely texture. You may be thinking, Donna doesn't have green pigment powder?? Blue plus gold and a tiny bit of brown mixed together created this lovely green color. It's hard to capture in a photo, but there is a lovely shimmer on the flower and leaves from the mica powder. Once dry, I rubbed lightly with Stormy Mix'd Media ink to highlight the texture.

My background paper is from the corner of a 12 x 12" patterned paper. I just adore the textured patterns in the corner, so added similar stamping and shading around the page edge for a finished look.

I hope you've been inspired to experiment with Donna's Girlie Grunge products
to create your own one of a kind textures and colors.

Here are links to the other pages in my Art Journal:

~ Blessings ~


Donna Salazar Products


Donna Salazar Designs
Dear Sir ~ Rubber Stamp
Crackle ~ Rubber Stamp

Partner Products
Clearsnap®/Colorbox® ~ Foam Blending Tool
Clearsnap®/Colorbox® ~ Embossing Powder - Clear
Spellbinders®  ~ Radiant Rectangles
Scrapbook Adhesives by 3L® ~ Crafty Foam Tape

For a complete product list, please stop by my blog, Garden of Grace.

Sunday, October 11, 2015

Grateful Heart Thanksgiving Card by Tracey Sabella

Hi everyone! It's Tracey back to share a fall card created with Donna's gorgeous products paired with the PhotoPlay Autumn Day collection. I just adore coloring elements for my creations and Donna's Scrapbook Adhesives by 3L® Pigment Powders blended so wonderfully with her Clearsnap Smooch Spritz to color the chipboard leaves and canvas. Check out the details in the Tips and Techniques section below.

My husband's family has a large gathering of over 50 people who get together at his cousin's home to celebrate Thanksgiving each year. I created this card as thanks for all the hard work they put into hosting this wonderful holiday and family time.

"Thanksgiving Card"

Tips and Techniques
To create the fall colors on this lovely chipboard piece, I started by painting it with white gesso. When dry, I brushed with Donna's Clearsnap Smooch Spritz in Green Olive and Caramel Latte. To add some extra glimmer, I mixed her pink and gold pigment powders together into water and brushed it over the Caramel Latte Smooch. To keep the glimmery pigment powder from rubbing off, I sprayed with a fixative. 

The canvas mat for the sentiment is cut from one of Donna's canvas banners in her Scrapbook Adhesives by 3L® Pennant Set. I stamped a vine image with her Clearsnap Jasmine Mix'd Media Inx, then sprinkled and heat embossed with Jasmine Mix'd Media Inx Embossing Powder. I sprayed the canvas with water, then Caramel Latte Smooch Spritz to color. You can see the subtle vine design on the corners.

 I cut a length of Donna's Scrapbook Adhesives by 3L® Lace Ribbons in half, then distressed the edge for a grungy effect. The layers are adhered with Scrapbook Adhesives by 3L® Dodz and Crafty Power Tape.

One last view. 

I hope you've been inspired to grab your Donna Salazar products
and color elements on your next project!!

~ Blessings ~


Donna Salazar Designs Products


Donna Salazar Designs
Vine - Rubber Stamp

Partner Products


Pumpkin Patch
Multi Stripe

For a complete product list, please stop by my blog: Garden of Grace.

Friday, September 25, 2015

"Fall" in Love Wall Hanging by Misty Russell


Hi everyone!  
Fall is in the air, and I am beyond excited!  It may have been 86 degrees out today but it hasn't stopped me from filling the house with scents of fall and decorating my porch with lots of mums, pumpkins and other autumn goodies!   I even bought an apple cinnamon air freshener for my car.  
So it is only fitting that my project today is also celebrating the fall season!


 Thankfully I had the perfect products to create such a project!  I have a video tutorial so I won't go into a lot of detail on how I created this, but I will tell you that the beautiful papers are the "autumn day" collection from photoplay and the tree was created using Donna Salazar's Scrapbook Adhesives by 3L® Organza ribbons (Textured Ribbons pack) and 3D foam swirls.

 
 I had so much fun molding creating this scene and I love how the tree turned out.


I know that not many flowers are in bloom on trees in the fall but I couldn't resist using Donna's rose creations die and giving the tree a little extra love. 


Here is the video showing how I created it:

Donna Salazar Designs Products


Thank you so much for stopping by!

Thursday, September 24, 2015

Girlie Grunge Christmas Card by Tracey Sabella

Hi everyone, it's Tracey back with another girlie grunge project to share with you today. 

Christmas is just around the corner, so I decided to get a jump start on my Christmas cards, pairing Donna's fabulous products with the Dear Santa paper collection by PhotoPlay

One of the things I adore about using Donna's products is that they are so versatile. There seems to be no end to the cool things you can create with them. Need a Christmas tree? No problem - cut it out of her Scrapbook Adhesives by 3L® burlap ribbon from the Texture Ribbons pack. Want to color it green? Grab her Clearsnap® Evergreen Smooch Spritz and brush it onto the burlap tree!! Here's my card. I share close-ups with all the creative details in my Tips and Techniques section below.


Tips and Techniques
Here's the tree I mentioned. I simply cut it from Donna's burlap ribbon. I cut out the tree shape and placed it on an Adhesive Sheet by Scrapbook Adhesives by 3L®, then trimmed around it, peeled off the backing and placed it on the card. This is a perfect way to hold those grungy frayed edges in place.

As I was creating, decided that I wanted my tree to be green so I spritzed some Evergreen Smooch Spritz onto my craft mat with a little water and brushed it across the burlap - the perfect color for a Christmas tree. 

For the snow on the tree, I randomly spread Donna's Clearsnap® Emboss Gloss, then sprinkled with her Clearsnap® Jasmine Mix'd Media Inx Embossing Powder and heat set.

I spread a few of Donna's Scrapbook Adhesives by 3L® E-Z Stars across my non-stick craft mat, then rubbed her gold Pigment powder (also by Scrapbook Adhesives by 3L®) across them to get this shimmery gold color. I lifted the colored stars with a metal palette knife to move them to the tree.

The music note rose bud is die cut with Donna's Spellbinders® Rose Creations dies. I cut two of the smallest rose petal sections, forming a bud in the center. I cut a snippet of Donna's Scrapbook Adhesives by 3L® Lace Ribbon to layer under the bud. They are held in place using Scrapbook Adhesives by 3L® Medium DODZ™.

I've embellished this darling Scrapbook Adhesives by 3L® 3D Foam Snowflake with Donna's Clearsnap® products. First I very lightly sprinkled one side with Donna's Jasmine Mix'd Media Inx Embossing Powder, then sprinkled a bit of her Sugar Shimmer Twinkle Dust Glitter. Be sure to tap off any excess before heat setting, or you just might have glitter flying everywhere. I just adore the texture of the embossing powder paired with the shimmer of this super fine glitter.

I layered pieces of Dear Santa Cozy Up and Let it Snow paper and tucked Donna's sweet lace into the layers. The sentiment is also from the Dear Santa Element Sticker sheet. The edges are lightly distressed using the edge of my scissors blade and then inked with Donna's Stormy Mix'd Media Inx.

I've also splattered the background, including the tree with white drawing ink from my stash.

 I thought I'd also share a shot of the inside of the card. If you look carefully, you'll see I tucked a piece of Donna's organza lace from her Textured Ribbons pack between the layers. The sentiment is stamped with Donna's Midnight Mix'd Media CHOX Inx.

I hope you've been inspired to add wonderful texture and
color to your next card project with Donna's fabulous products!

~ Blessings ~


Donna Salazar Designs Products


Partner Products
Spellbinders ~ Artisan X-plorer (Retired)

 Cozy Up
Let it Snow
Element Sticker

For a complete product list, please stop by my blog HERE.

Thursday, September 10, 2015

Girlie Grunge Fall Banner by Tracey Sabella

Hi everyone!! It's Tracey back to share another project created with Donna's fabulous products!

This month Donna's Creative Team is featuring paper collections from the brand new company, PhotoPlay. Today I've used paper and stickers from the Autumn Day Collection

As you may have noticed, I tend to cut up Donna's Pennant Set by Scrapbook Adhesives by 3L® to create other embellishments like handcrafted flowers. I've finally used the canvas pennants from the set to create a fall banner. I'll let you in on a little secret, this is my first attempt at a banner.

Our son and daughter-in-law recently moved into their dream home. Our son loves to fish and has docked his bass boat at my parent's place on the lake for years. One moonlit night several years ago, Joseph took Rachel for a ride in his boat. He asked for her hand in marriage under the bridge between the two lakes. How romantic is it that their new place overlooks that bridge? Rachel adores decorating for the fall season, so as a house warming gift, I've created this home decor banner for them. Rachel had a special place in mind for it the moment she saw it. 


Tips and Techniques
Staying true to my style, I've added a little grunge to the fall stickers by rubbing them with Donna's Clearsnap Sparrow Mix'd Media Inx CHOX transforming the bright white to a soft tan color. I also edged them with Midnight CHOX Ink. I added a little shimmer by painting the striped inner portion of the letters with Donna's Scrapbook Adhesives by 3L® Pigment Powders mixed with water. 

I've created these sweet flowers by pairing Donna's Spellbinders Bitty Blossoms dies with the Autumn Day Plaid paper surrounded by Donna's Scrapbook Adhesives by 3L® Lace Ribbons. I cut the ribbon down the center and distressed it before coloring with Pigment Powder left over from the letters. I mixed pink, gold, and brown Pigment Powder to achieve this color. 

My step by step Bitty Blossom tutorial can be seen HERE. **Note** One of Donna's Scrapbook Adhesives by 3L® Dodz™ XL works perfectly to hold the flower together in place of the glue.

The twine flower base is also handcrafted and a step by step tutorial for them can be found here. I've adhered the flower layers together and then to the canvas using Donna's Dodz™ XL.

On the canvas pennants, I stamped a script image with Jasmine Mix'd Media Inx, then sprinkled with and heat set Jasmine Mix'd Media Inx Embossing powder. I spritzed the canvas with water, then with Donna's Clearsnap Pralines & Cream Smooch Spritz. To add more splotchy color, I spritzed some of the Smooch onto a craft mat, added more water, then pulled the pennants through the color. The embossing acts as a resist so that the script shows up nicely on the background.

I've tucked in a couple dried flower pods on each banner.

I topped each of the pennants with the looped lace from Donna's Lace Ribbons set, adhered with Scrapbook Adhesives by 3L® Premium Double-Sided Tape. Between pennants I've placed another handcrafted Bitty Blossom flower, this time using the Autumn Day Multi Stripe paper.

To string the banner together, I placed an eyelet in the top corners of each pennant and ran hemp twine through to lace them together. The looped lace and Bitty Blossoms "hide" the eyelets.

I hope you've been inspired to grab your girlie grunge Donna Salazar products
and create a fall banner for your home. 

~ Blessings ~


Donna Salazar Designs Products

Monday, August 10, 2015

"Strength of My Life" ATC by Tracey Sabella

Hi everyone! It's Tracey back to share a new project featuring Donna's fabulous products. I wanted to do something that would brighten my day when I see it and came up with this sweet ATC. This is my first attempt to try out an ATC size project. I hope you enjoy it! 

"Strength of My Life"

Tips and Techniques
I grunged up one of Donna's Scrapbook Adhesives by 3L® 3D Foam Swirls by sprinkling with her Clearsnap Twinkle Dust Glitter and Jasmine Mix'd Media Inx Embossing Powder and heat set. For a finishing touch, I rubbed it lightly with Donna's Scrapbook Adhesives by 3L® blue Pigment Powder.

I created two of Donna's Spellbinders Bitty Blossoms flowers. One in ivory mulberry paper and the other with a typeset print paper. I've filled in with some tattered lace and a bit of the looped lace from Donna's Scrapbook Adhesives by 3L® Lace Ribbons. The lace is colored with her Clearsnap Smooch Spritz and Pigment Powders.

This encouraging sentiment is stamped with Clearsnap/Colorbox Leather Mix'd Media Inx then heat embossed with coordinating Mix'd Media Inx Embossing Powder to really pop. The Leather Embossing Powder has a wonderful coppery metallic sheen.

Here's another snippet of distressed and colored lace. The video tutorial for my Girlie Grunge Denim Rose includes my process for altering the lace. You can view that video HERE.

I bought this pack of artist trading cards a long time ago and never realized they have embossed designs on them. I brushed the card with Donna's Sea Breeze Smooch Spritz to reveal the detailed, girlie embossing and rubbed her Brown Pigment Powder mixed with water along the edges.

So the next time you need a little pick me up, or a quick gift, try grabbing
Donna's fabulous products and create your own ATC.

~ Blessings ~
Tracey


Donna Salazar Products


Partner Products

For a complete product list, please stop by my blog, Garden of Grace.

Friday, July 10, 2015

"Trust in the Lord" Art Journal Page by ~ Tracey Sabella

Hi everyone!! It's Tracey here to share a page I created for my Scripture journal with this sweet verse from Proverbs.

I adore the generous size and substantial chipboard pages in Donna's Scrapbook Adhesives by 3L® Denim Art Journal. I've created handcrafted flowers with Donna's dies and share how I've used her inks and pigment powder to color my background and elements.

"Trust in the Lord"

Tips and Techniques
I created these little open roses with Donna's Spellbinder's Rose Creations dies. I cut them from thick vintage book pages and colored them with Vintage and Denim Mix'd Media Inx. I brushed the edges with Clearsnap Glue Gloss and sprinkled with Sugar Shimmer Twinkle Dust Glitter. I finished them by centering a rhinestone in each. I used Scrapbook Adhesives by 3L® Medium DODZ™ to adhere them to the page.

I colored light molding paste with Donna's Scrapbook Adhesives by 3L™gold Pigment Powder. This powder is loaded with shimmery pigment, so stir in a small amount of powder to start, and add a little at a time until you achieve the desired color. I used the colored paste to stencil the leafy vine behind the flowers.

Another view of my flowers.

On the background, I created a color wash by misting with water and spritzing with Donna's Clearsnap Sea Breeze Smooch Mist. As you can see some areas have more color wash than others, giving a lovely color variation to the background. I dabbed the stenciled areas with a paper towel to remove the color from the molding paste, so it would be more visible. Once the wash was dry, I splattered with drawing ink and liquid acrylic for more visual texture.

I stamped my Scripture sentiment with Donna's Midnight Mix'd Media Inx CHOX, which is permanent and quick drying. I stamped on white cardstock which I colored by rubbing lightly with Vintage and Stormy Mix'd Media Inx then edged with black. I adhered the strips with Scrapbook Adhesives by 3L™'s new product ~ Home & Hobby Premium Double-Sided Tape.

Lots of yummy layers here. The base is a strip of Donna's Scrapbook Adhesives by 3L® Canvas Ribbon. I removed the stitching and colored with her Clearsnap Caramel Latte Smooch Spritz, fraying the edges. Then I colored a strip of plaster wrap with Sea Breeze Smooch Spritz. (Plaster wrap is plaster of Paris embedded gauze strips and can be found at your local craft store,) The top layer is a tattered piece of Donna's Scrapbook Adhesives by 3L® Lace Ribbon. I grab up jewelry findings when I see them on clearance and this pendant is from by stash. I've filled in below the flower with seed beads and chunky glass glitter.

Here's a technique tip for you. To color fibers, spritz water on a craft mat, then spritz with Smooch Spritz. Swipe the fabric through the colored mist, until you have picked up enough to color the entire strip. Such an easy peasy way to color coordinate elements for your project.

I colored this die cut the same way that I colored the fabric. I wanted a distressed look, so did not attempt to evenly distribute the color.

I also used several of Donna's stamps with
Denim Mixed Media Inx to add more visual texture.

I hope you've been inspired to grab one of Donna's new Denim Art Journals
to experiment and create you're own special art pages.

To view my Faith art journal cover go HERE.

And my first Scripture art journal page can be viewed HERE.

*** Both of these pages include flower tutorials! ***

~ Blessings ~


*NEW* Denim Art Journal
*NEW* Pigment Powder ~ Gold
*NEW* Lace Ribbons
*NEW* Canvas Ribbons


Donna Salazar Designs
Rubber Stamp ~ Dear Sir
Rubber Stamp ~ Chicken Wire
Rubber Stamp ~ Vine

Partner Products
*NEW* Scrapbook Adhesives by 3L® ~ Home & Hobby - Premium Double-Sided Tape 1/2”
*NEW* Scrapbook Adhesives by 3L® ~ Home & Hobby - Premium Double-Sided Tape 1/8”

For a complete product list, please stop by my blog, Garden of Grace
.

Tuesday, April 28, 2015

"Things Above" by ~Donna

Hello again! Wow... two posts from me in one day! It's been forever since I've done this. But, I am behind and I'm catching up so really I guess it isn't that impressive... LOL!

I made this mixed media canvas for the His Kingdom Come "Take Me Deeper" project. The bible verse is Colossians 3:2 - "Set your affection on things above not on things on the earth". 

I felt that a starry sky was a great background for this bible verse so I made the background with my Smooch Spritz from Clearsnap again. The Smooch Spritz makes these wonderful little spots when you dry the spritz with a heat gun, especially if it is spritzed over a wet medium. In this case I added a tiny bit of Ceramic Stucco to the entire background but made it thicker towards the bottom. I spritzed it with Sea Breeze on the top, Wood Stain on the bottom and added a light misting of water to get the spritz dripping then I dried it with a heat gun.


In the photo below you can see the texture that showed up when the spritz dripped into the wet Ceramic Stucco paste as well as a little bit of crackling.

In the photo below you can see some of those spots that showed up in the Smooch Spritz background as well as my FAVE little E-Z Stars from Scrapbook Adhesives by 3L™ with some Twinkle Dust Glitter from Clearsnap. I used Spectrum Noir alcohol pens to outline the stars, the bible verse and add a little bit of doodling around the edge of the bible page border on the canvas.

Below is another close up of the background and stars. I also used my Mix'd Media Inx CHOX around the edge of the canvas to give it a vintage feel and to also stamp the bible verse.

 I painted the heart with Ceramic Stucco then added some Liquitex paint over the top. I used my Brown Pigment Powder mixed with Fast Finish Decoupage around the outside of the heart. 
Product used:

Pigment Powder - Brown
E-Z Stars

Smooch Spritz - Sea Breeze, Wood Stain
Twinkle Dust Glitter
Mix'd Media Inx CHOX - Patina, Sparrow, Midnight

Liquitex - Ceramic Stucco Texture Paste
Beacon Adhesives - Fast Finish Decoupage
Spectrum Noir - Alcohol Markers
Thanks for Stopping by!!! Smooches ~D~
Where to find Donna: