Showing posts with label Hazel and Ruby. Show all posts

Friday, July 3, 2015

"#NormalFamily" Home Decor Sign by Donna

Hello my peeps! I have a quick little project to share with you today using a couple of my products from Scrapbook Adhesives by 3L™. The project is the wooden sign hanging above the photo canvas but I feel that I should explain the photo because most people wouldn't make a canvas out of a blurry picture where everyone isn't looking their very bestest. But... I absolutely LOVE this photo. When my sister took this picture of us we were being so goofy that she couldn't help but laugh and the camera kept moving. She kept trying to take the photo but it gave my husband and son more time to make even goofier faces so this photo ended up being the best one. Even though it is blurry, we are making faces and my hair is all messy it is a perfect representation of our family... So I made it into a canvas knowing that I would have to make a goofy sign to go with it. 

The quote says "Remember... as far as everyone knows we are a nice #NORMALFAMILY"


Here are some close ups of the sign:

I used my new Lace Ribbons from Scrapbook Adhesives by 3L™ to hang the sign.


I used some stencil masks from my friends at Hazel & Ruby to add the large letters. I used Spectrum Noir pens to outline the letters and add a drop shadow to the word strips.


I used Fast Finish Decoupage with my new Pigment Powder from Scrapbook Adhesives by 3L™ to add a bit of gold shimmer to the edge of this mixed media sign.


I used my Mix'd Media Inx CHOX to stamp the words onto the word strips. I inked the edges of the strips with my original Mix'd Media Inx then tapped the edges onto the pad of the same color of Mix'd Media Inx CHOX that I had stamped the letters in.


Product used:
*NEW* Lace Ribbons
*NEW* Pigment Powder - Gold

Mix'd Media Inx - Honey
Mix'd Media Inx CHOX - Sparrow

Hazel & Ruby® - Stencil Masks - Central Park
Liquitex® - Basics Acrylic Paint
Beacon Adhesives - Fast Finish Decoupage

Thanks for Stopping by!!! Smooches ~D~
Where to find Donna:

Thursday, May 21, 2015

"In His Presence" by Donna

Hello my peeps. I'm a couple weeks behind on my mixed media canvases for the "Take Me Deeper" project. I've actually stepped down as a moderator but I love this project and I am determined to have 52 canvases at the end of the year so I am going to keep participating.

This is the canvas that I created for the 2nd week of May (a little late... LOL!)

I love all the texture and grunginess that I got on this canvas. I used stencil masks from Hazel & Ruby, Liquitex paints and my Mix'd Media Inx CHOX from Colorbox to make this canvas.


I created a peeled paint background, added the stencil masks, then added a layer of white paint over them. This allowed me to remove the letters while the paint was still wet and I still have the fun girly grunge texture on the letters and in the background.


I rarely write on my canvases but I felt like this one needed a little something to the left so I pulled out my Spectrum Noir pens because they work best over painted surfaces.


After I outlined the words with the pens I used my Mix'd Media Inx CHOX to add some grunge to the edges as well as some stamped leaves and swirls. The CHOX dry fast but to make sure that they are sealed to the canvas I added a layer of Matte Medium.

Product used:
Mix'd Media Inx CHOX - Sparrow, Patina

Hazel & Ruby - Stencil Masks - Central Park, Brooklyn
Liquitex - Basics acrylic paint, Matte Medium
Spectrum Noir - Alcohol Markers

Thanks for Stopping by!!! Smooches ~D~
Where to find Donna:

Wednesday, May 13, 2015

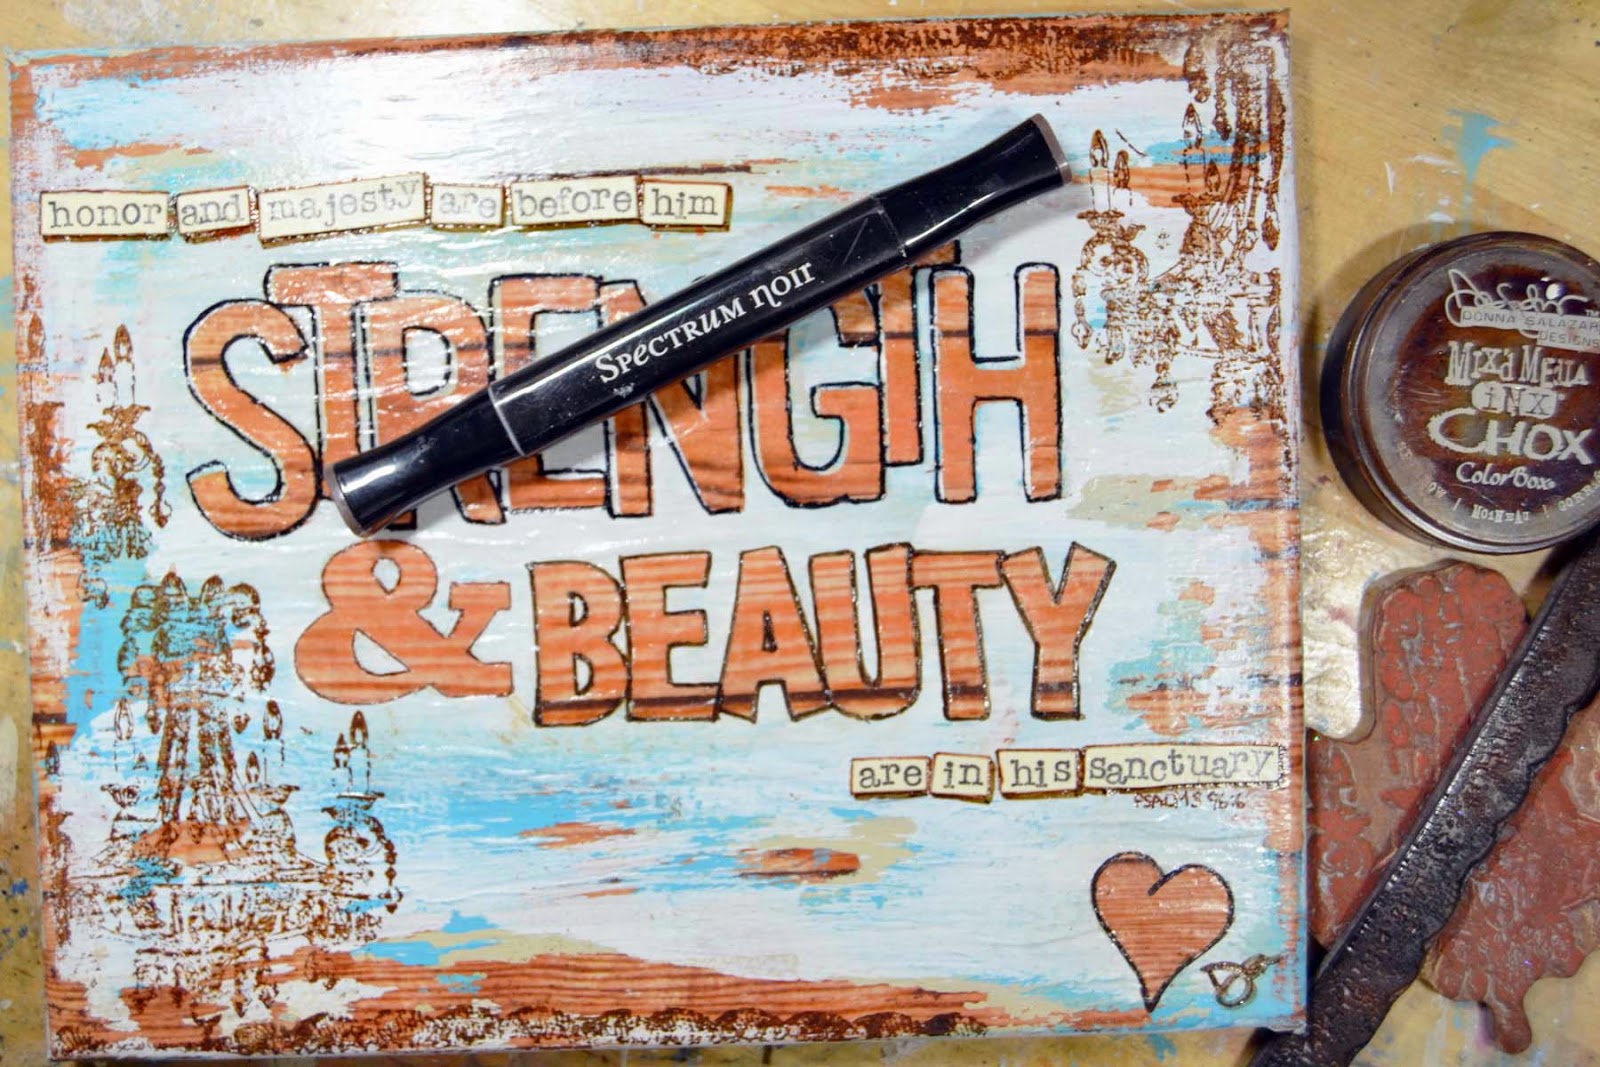
Strength & Beauty by ~Donna

Hello my peeps! Today, not only am I sharing a mixed media canvas that I've created for the "Take Me Deeper" project on the His Kingdom Come site, but I also have a FREE start to finish video (which I haven't done in a while) and additional step by step photos below. You can watch the video by clicking on the link below:

Donna's Strength & Beauty Tutorial Video


The topic for May is "Sanctuary". The bible verse that I chose isn't actually one of the verses for this week's lesson but I really wanted to use it and it fit so well. "Honor and majesty are before him. strength and beauty are in his sanctuary" Psalms 96:6

I made the background of the canvas with Hazel & Ruby's DIY Decor Tape & Stencil Masks. I've found some helpful tips through trial and error and I wanted to share them with you.

Starting The Canvas

Most importantly, you need to start with a canvas that has been treated. A dry canvas will make it so that the Decor Tape won't stick. I use a couple layers of Fast Finish Decoupage.

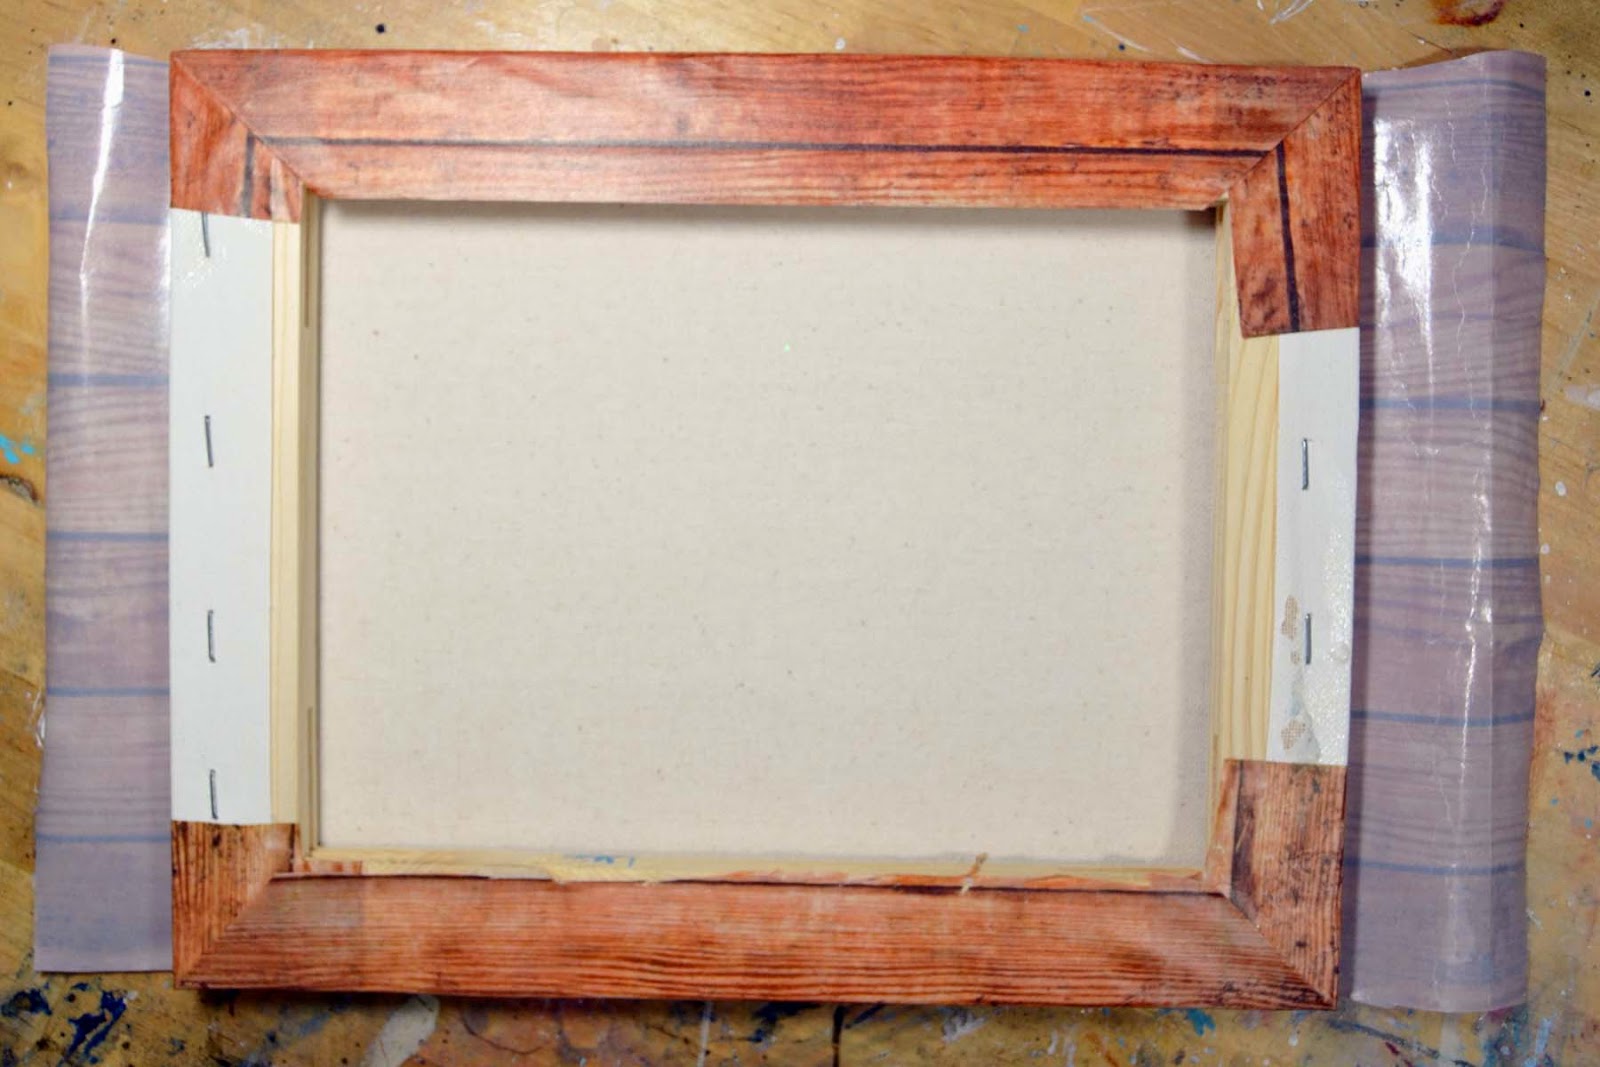
 Cut your tape bigger than the canvas and lay it down with the image facing your work table. Slowly peel the backing away, leaving about 1 inch on the right side and crease the backing so it will help to hold the tape flat.

Lay the canvas in the center of the tape and use your hand to rub the canvas into the tape to get out any air bubbles.

Turn the canvas over and smooth out the tape all the way to the edges of the canvas.

Cut the excess tape from the edge to the top corner of the canvas.

Fold the edge of the tape up along the sides of the canvas.

 Fold in the sides, crease the edges (like a present) then fold the flap down.

 Repeat on the bottom of the canvas.

Fold the sides up and over the back.

Turn the canvas over and add your stencil masks.

Finishing The Canvas

I added stamped images on the canvas using my Mix'd Media Inx CHOX in Sparrow. This ink dries fast but when stamping over paint you may want to blot it dry or use a heat gun to make sure it is set. I also used a Spectrum Noir alcohol pen to outline and add a drop shadow to the bible verse word strips. I've found that these pens work best over painted surfaces.

I used an ink blender and my Mix'd Media Inx CHOX in Patina to add a soft blue edge to the canvas.

I used my Mix'd Media Inx in Sparrow on the edge as well to give it a bit of a vintage look.

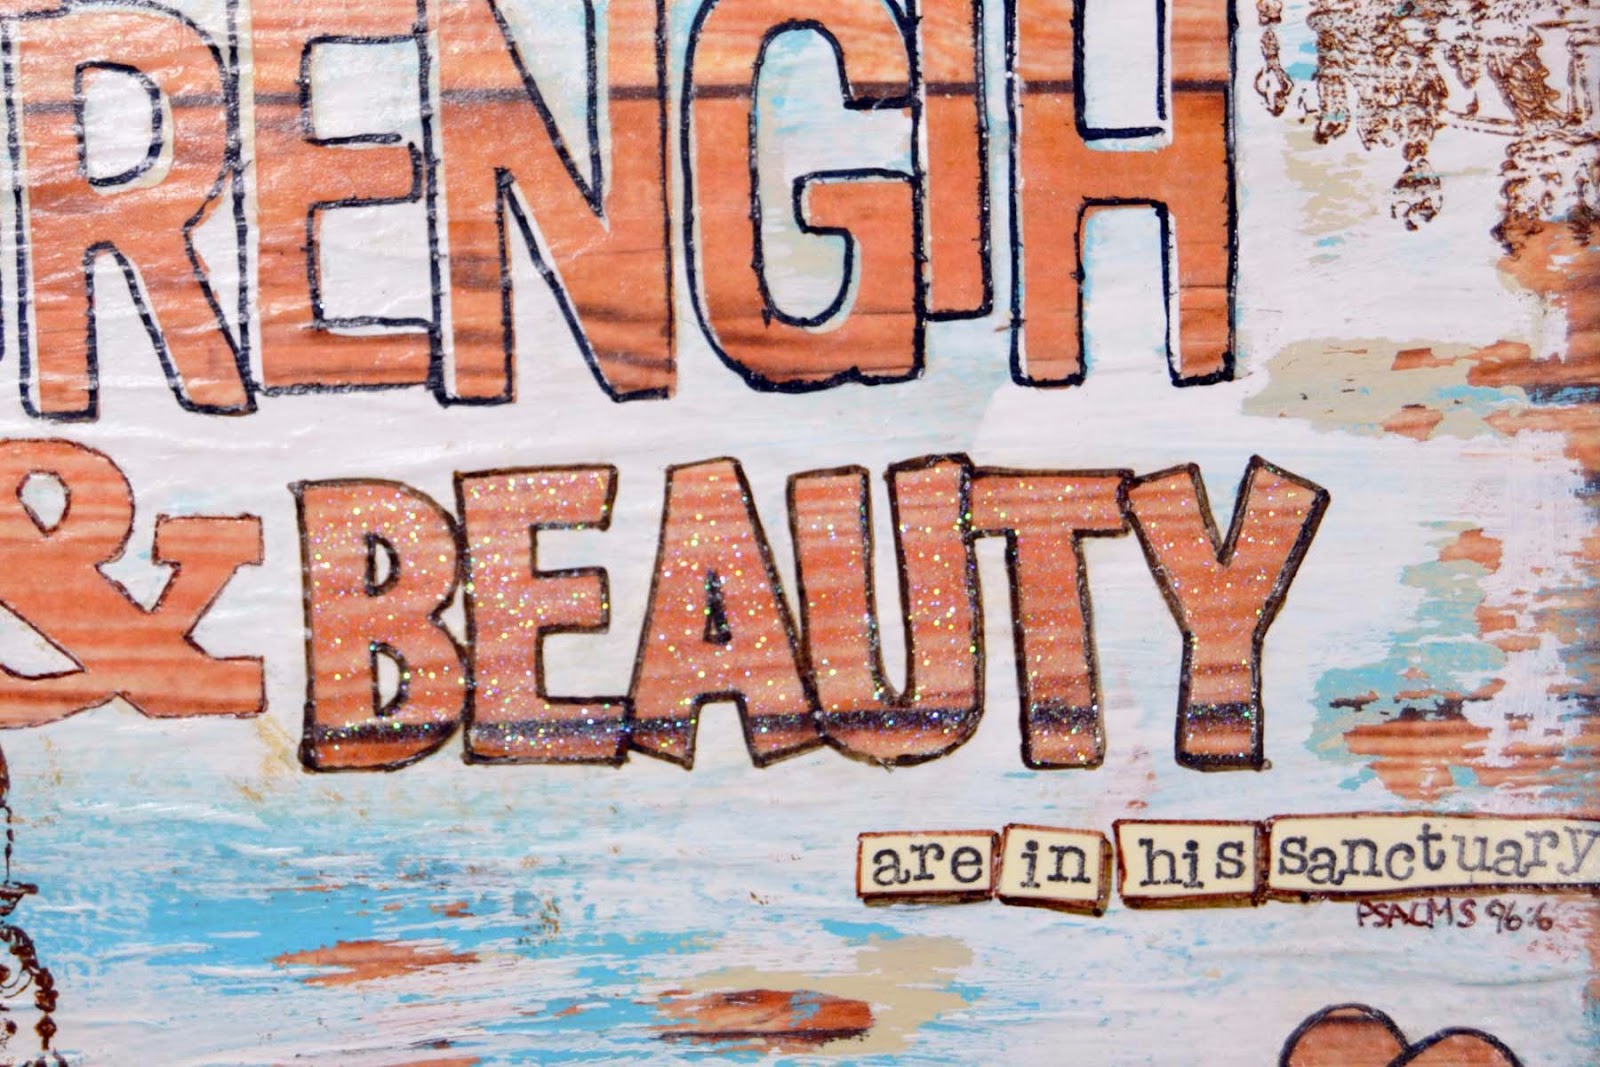
 I used some Glue Gloss with my Twinkle Dust Glitter (both from Clearsnap) to add a bit of sparkle to the word Beauty. You can see how easy this is on the tutorial video.

 The photo below is the finished word.

At this point I added some Matte Medium from Liquitex to seal the ink and the glitter to the canvas because I thought I was done, but then... 

I decided to add a little somethin' somethin' with my "Embroidered Flower" stamp and Driftwood Mix'd Media Inx CHOX... 

But the design didn't show up very well so I added more with my Mix'd Media Inx CHOX in Sparrow. I added another layer of Matte Medium when I was done.

Here are some close up photos of the finished canvas:


I hope you enjoyed this tutorial and that you are able to take some time to watch my 

Product used:
E-Z Dots - Temporary

Mix'd Media Inx CHOX - Sparrow, Driftwood, Patina
Twinkle Dust Glitter
Glue Gloss

Hazel & Ruby - DIY Decor Tape - Wooden Grain & Stencil Masks - Central Park, Blindside, Brooklyn
Liquitex - Basics acrylic paint, Matte Medium
Beacon Adhesives - Fast Finish Decoupage
Spectrum Noir - Alcohol Markers

Thanks for Stopping by!!! Smooches ~D~
Where to find Donna: